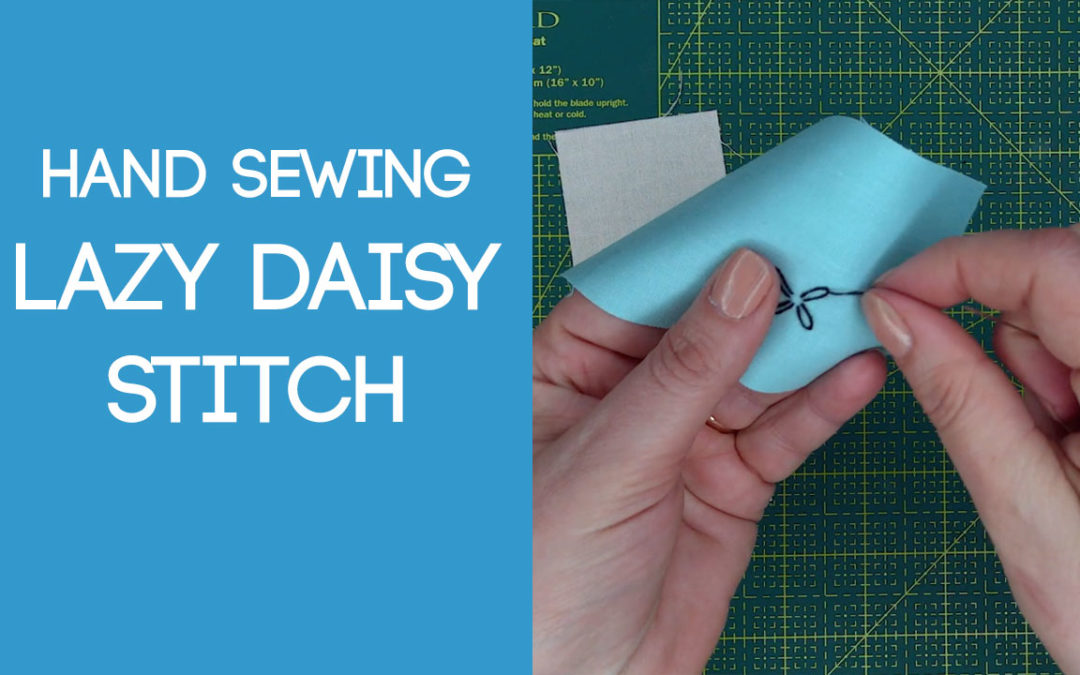
Lazy Daisy Stitch:
- Thread the needle and place a knot at the base of the thread.
- Insert the needle through the back of the fabric and pull through until the knot is securely in place.
- Insert the needle back close to where the knot is positioned and picking up a small amount of fabric, run the needle’s point up through the front of the fabric.
- The needle will now be sitting with a piece of fabric over it, wrap the thread coming from the material around the needle and pull the needle all the way through.
- To anchor the individual stitch take the thread back over the top of the loop and into the fabric.
- This will create the first lazy chain stitch.
- To continue work the same stitch as before, just to the side of the flower, working your way around in a circle.
- Continue until you have the desired amount of lazy daisy pedals.
- Pull the needle through to the back of the fabric and back sew over the last stitch a couple of times to secure.
- Snip off thread.