
Owl & the Pussy-cat Pattern & Tutorial
Materials:
- Boat – 2 sheets of A4 felt (colours 2 shades of green)
- Owl, pussy-cat & guitar see patterns for felt amounts (mix and match colours as you choose)
- Embroidery thread / floss to match the colours of felt chosen
- Flower trim (optional, this can either go around the circumference of the boat, just at the from section or not at all if desired)
- Polyester craft filler
Tools:
- Paper and fabric scissors
- Pins
- Embroidery needle
- Printer & A4 paper
To make:
Download the patterns and print out on A4 paper at 100% Pattern 1, Pattern 2, and cut out using the paper scissors.
Note: Using a good fabric scissors to cut paper will dull the scissors.
Boat:
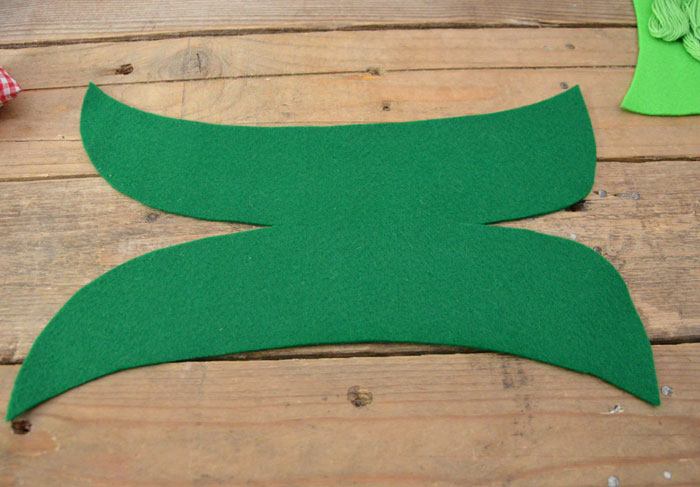
Pin the boat pattern to the two sheet of felt and cut out.
Take one of the felt boat pieces (the one you want for the outside of the boat) and fold in half as shown in the image below.
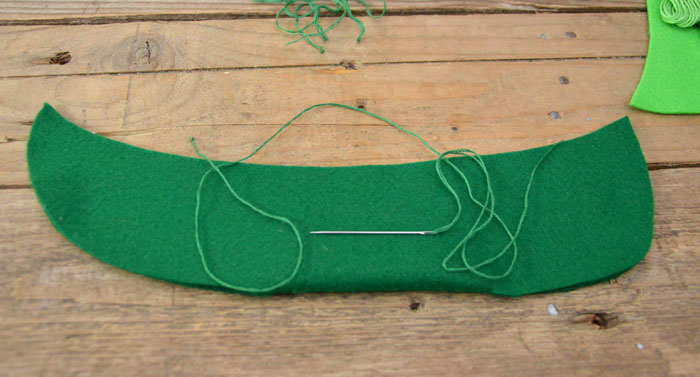
Using 2 strands of the embroidery thread/floss whip stitch along the curved ends both sides of the boat.
Click on each of the sewing graphics for instructions as you progress through the project.


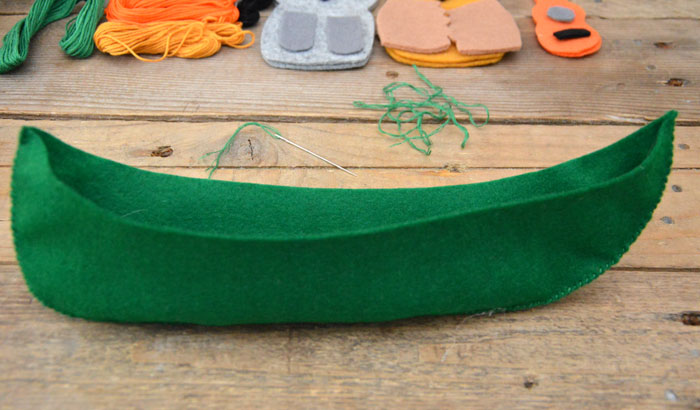
Stand the boat upright when you have finished sewing.
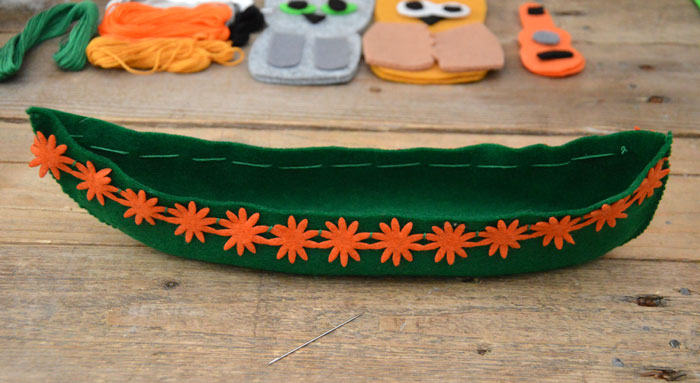
Optional: Stitch the flower trim onto the top circumference of the boat using a long and short running stitch.

Repeat the first step and sew the second boat shaped felt.
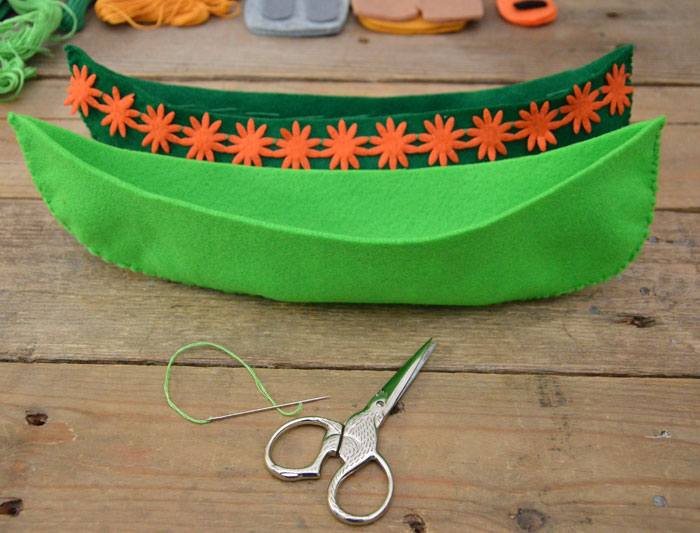
Place the second boat inside the first boat, pin in place making sure to match up the seams all the way around.

Whip stitch around the top of the boat.

The boat is now ready, leave aside for the moment.

Cat:
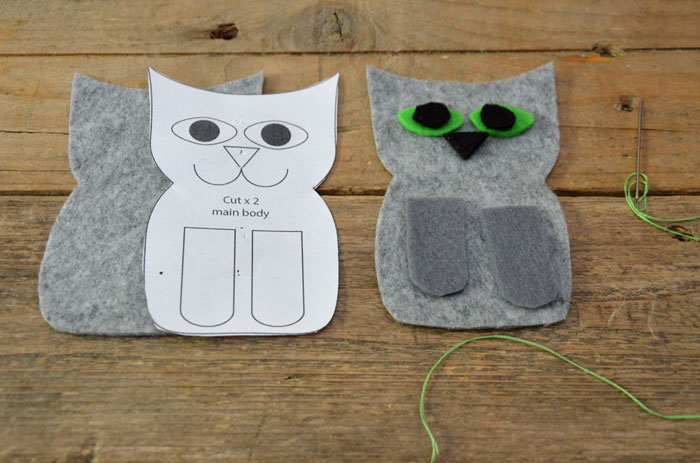
Cut out all of the cat pattern pieces from your chosen colours of felt. The eye and nose pieces are quite small so they will need to be held in place and cut out very carefully.
Starting with the eyes, sew in place using the whip stitch appliqué and 2 strands of matching embroidery thread/floss.
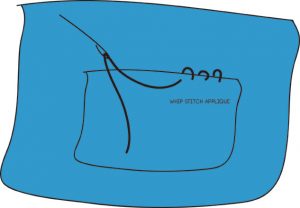

Rethread the needle with 2 strands of black embroidery thread/floss and sew the eyes & nose in place again using the whip stitch appliqué.
Using the paper pattern as a guide fill in the mouth area using the back stitch.

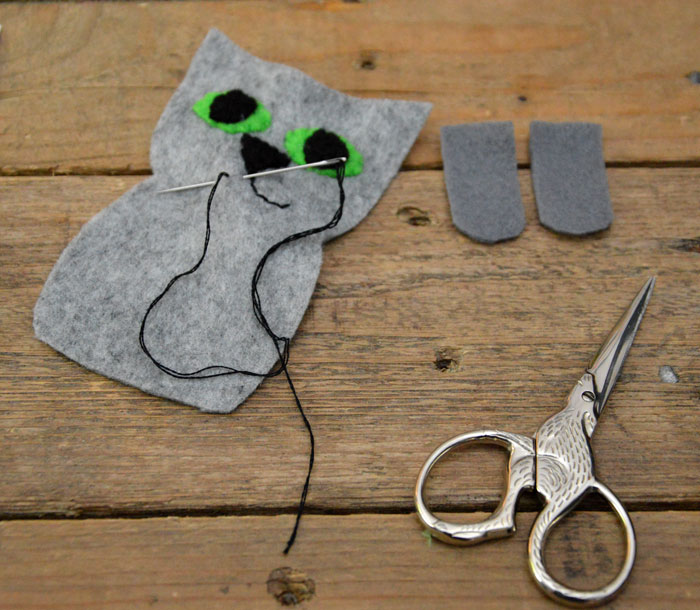
Rethread the needle with 2 strands of matching embroidery thread/floss to the cat legs, position as per the pattern and whip stitch appliqué in place.


Place the front and the back pieces of the cat together, start sewing on the right hand side just below the neck and whip stitch all the way around the circumference, leaving a small opening to stuff the cat.

Stuff the cat with the craft filler and whip stitch the opening closed.
The cat is now finished, leave aside for the moment.

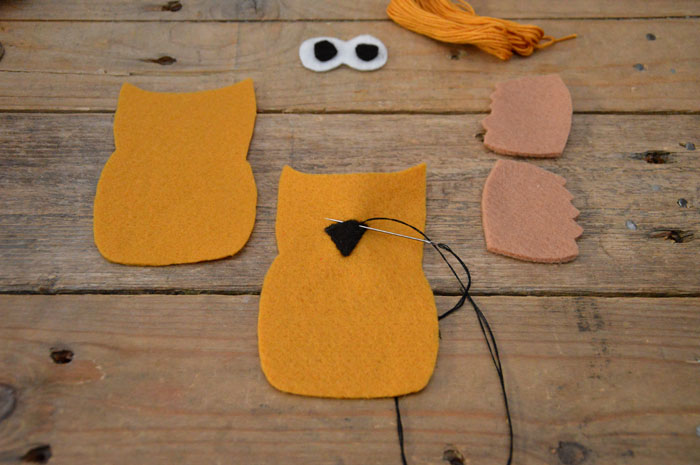
Owl:
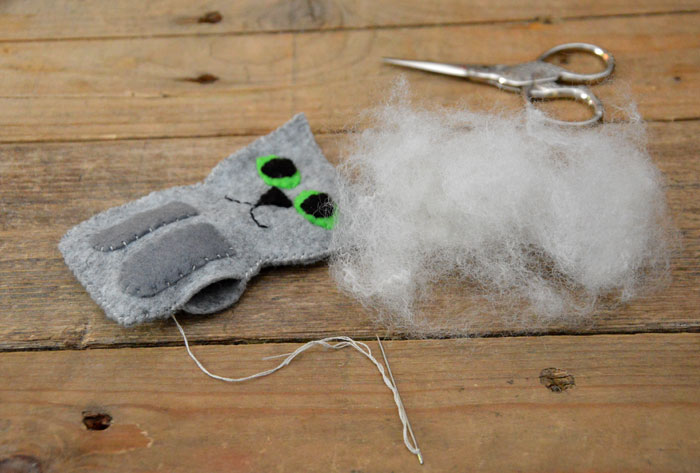
Cut out all of the owl pattern pieces from your chosen colours of felt. The eye and nose pieces are quite small so they will need to be held in place and cut out very carefully.

Starting with the nose, position as per the pattern and sew in place with 2 strands of matching embroidery thread/floss, using the whip stitch appliqué.
Rethread the needle with matching embroidery thread/floss and sew the eye sections in place covering the nose as per the pattern. Using 2 strands of the thread.
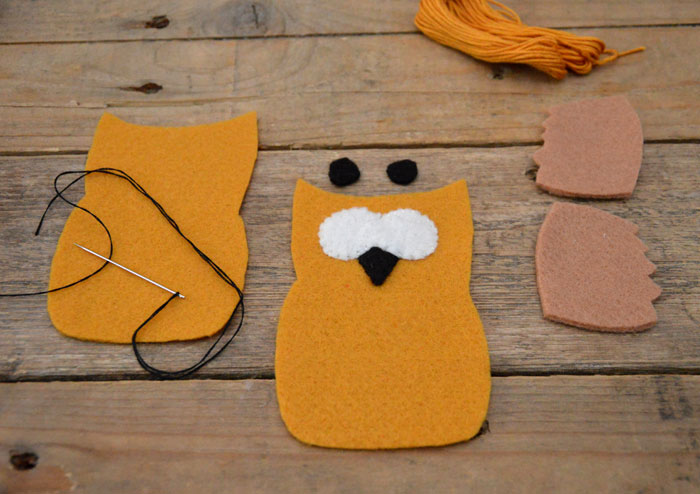

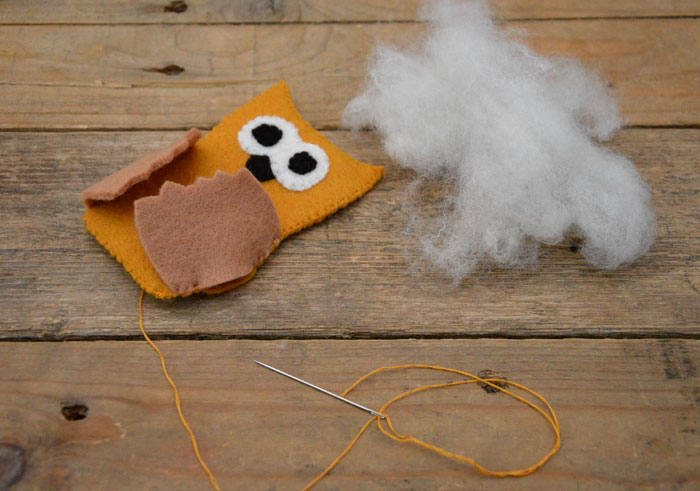
Place the front of the owl and the back of the owl together, position the wings as per the pattern and start whip stitching again just below the neck on the right hand side.

Whip stitch around the circumference making sure to catch the wings and two body piece as you go. Leave a small opening. Stuff with the crafter filler and continue with the whip stitch to close.
The owl is now finished, leave aside for the moment.

Guitar:
Cut out all of the guitar pattern pieces from your chosen colours of felt. The circle and triangle pieces are quite small so they will need to be held in place and cut out very carefully.

Whip stitch appliqué the circle and small rectangles in place as per the pattern, using 2 strands of matching embroidery thread/floss.
Finish the front of the guitar by running three long stitch between the two rectangular sections.

Place the front of the guitar over the back and whip stitch together around the circumference using 2 strands of matching embroidery thread/floss.
No stuffing required for the guitar.
The Guitar is now ready.

The Owl and the Pussy-Cat
Gather up your owl, pussy-cat & guitar and place into their pea green boat.


My Book – Sewing Animal Dolls

Adorable! I have to give this a try.
Amalia
xo
Hi Amalia, thank you, do send me a picture I would love to see your creations 🙂