
UPDATE – hi, I have just recently added an updated version of my Snuggle Bunny Sewing pattern and have added a step by step hand sewing video tutorial as well, it is available at this link CLICK HERE.
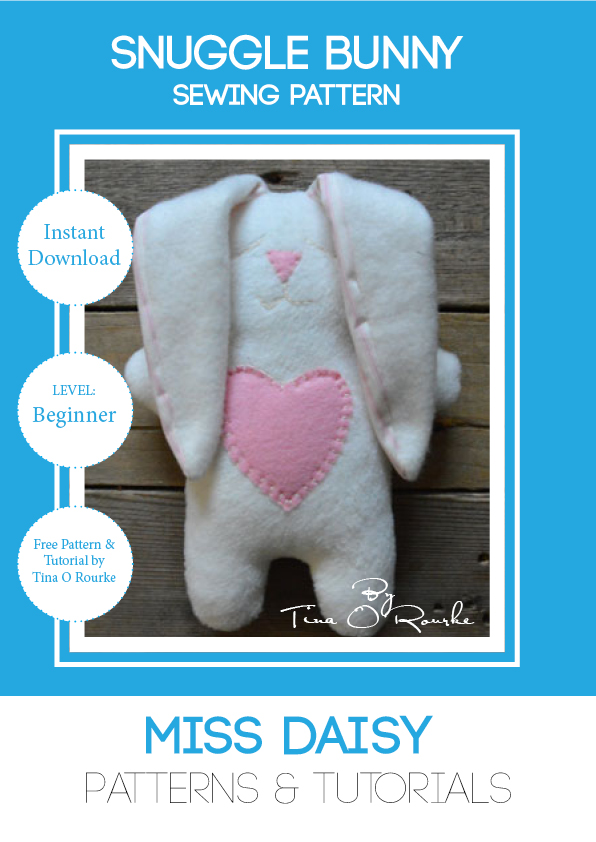
Snuggle Bunny
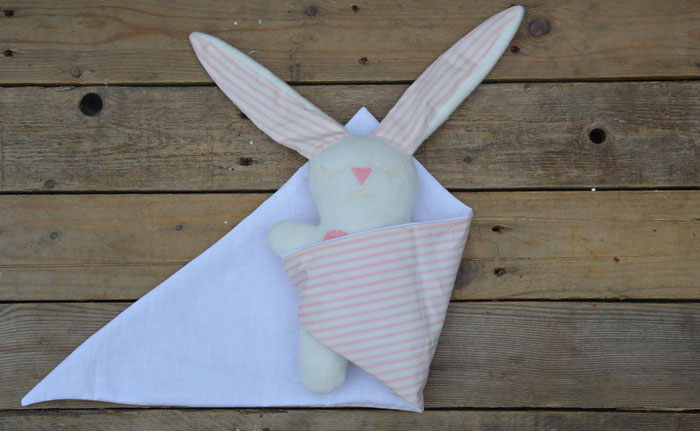
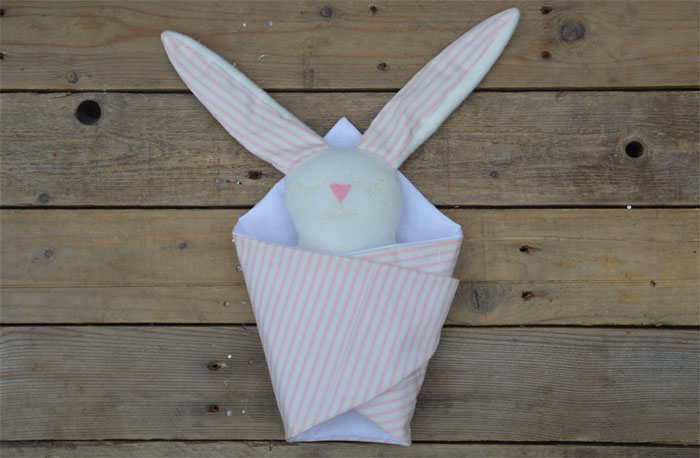
Our cute little snuggle bunny sewing pattern is ready just in time for Easter. Snuggle bunny makes a great cuddly pressie, complete with her own blankey.
Materials:
- 22” x 8” / 55.5 cm x 20.5 cm Cream Fleece (Snuggle Bunny Main Body)
- Scraps of Pink Wool Mix Felt (Snuggle Bunny heart & nose)
- 10” x 8” / 25.5 cm x 20.5 cm piece of Pink & Cream Cotton (Snuggle Bunny ears)
- 10” x 8” / 25.5 cm x 20.5 cm piece of Cream Fleece (Snuggle Bunny ears)
- 2 triangles of Pink & Cream and White Cotton for the Blankey measuring 25” x 16 ½” x 16 ½” / 63.5 cm x 42 cm x 42 cm
- Cream embroidery thread / floss
- Polyester craft filler
- Cream machine sewing thread
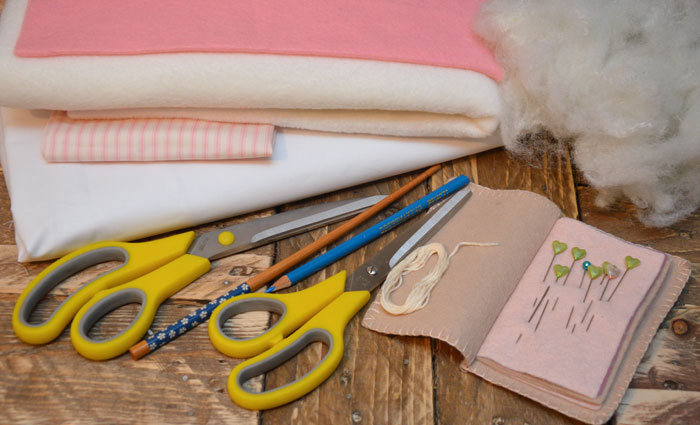
Tools:
- Sewing machine (Set on a straight stitch with a stitch length of 2.5)
- It is also advisable to use a stretch material machine needle size 14/90.
- Chopstick
- Tailor chalk pencil (blue)
- Pins
- Embroidery needle
- Scissors paper & material
- Printer & A4 paper
How to make:
Download Snuggle bunny pattern
Update: 13th March 2018 The sewing pattern has been updated to download in one go by clicking on the blue button above. Any queries please do contact me via email at hello@missdaisypatterns.com
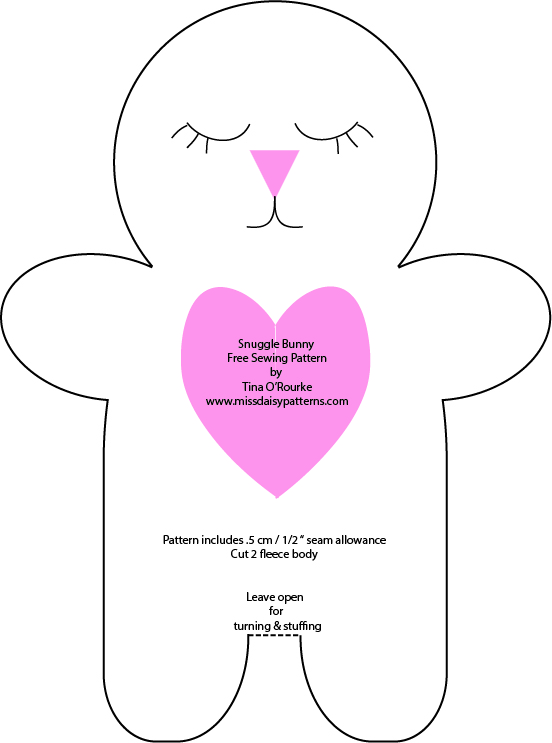
Print out the pattern on A4 paper at 100%.
Cut out all of the paper patterns with your paper scissors.
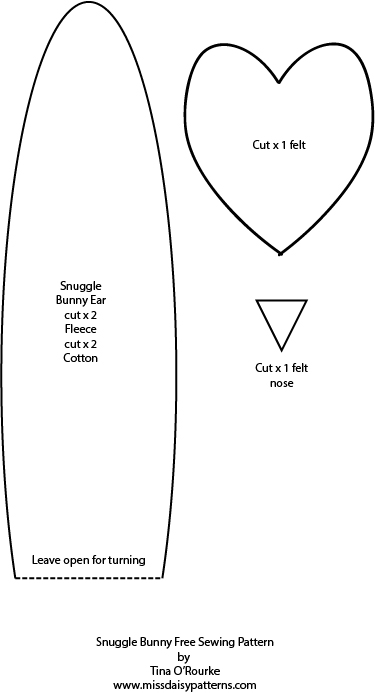
Cut out the heart and the nose from the felt.
Cut out the ears, two from the cotton and two from the fleece.
Cut out 2 body sections from the fleece.
Ears:
Place one of the cotton ears and one of the fleece ears, material right side to right side, together & pin in place.
Machine-sew around the ears leaving the bottom section unsewn for turning. Start at point A marked on the pattern and finish at point B.
Turn the ear right side out using the base of the chopstick. Push the tip of the ear inside the top of the ear and guide it through to the unsewn opening.
Repeat on the second ear and both ears aside.
Body:
Take one of the main fleece bodies lay on the table right side facing towards you.
Take the felt heart and place on the front of the body as shown in the pattern.
Using two strands of cotton embroidery thread/floss blanket stitch the heart in place.

Take the felt nose and place in the centre of the face as shown in the pattern.
Using a whip-stitch sew in place.

Using the blue tailor chalk pencil mark in the mouth and the eyes as shown in the pattern.
Using the chain stitch sew in the outlines.

Take the ears and position the cotton sides flat onto the fleece body, the open ends lined up with the top of the head.
Lift the body slightly and pin the ears in place on the reverse of the body. (Wrong side of the material)

Take the second body piece and lay right side down over the body and the ears.
Make sure the bulk of the ear material is in the centre of the body.
Pin the two body sections together.
Start machine sewing at point A marked on the pattern, using a .5 cm / ¼ inch seam allowance, and finish at point B.
When you are finished machine sewing the body together, unpin and snip into the arm and neck corners, avoiding cutting through the lines of sewing. (This allows the seams to sit smoothly when the body is turned).
Reaching into the open section with your fingers, pull the body through using the tops of the ears.
Once the body is right side out, push put any of the curved areas with the base of the chopstick.
Stuff firmly, but not too full, with the polyester craft filler.
Whip stitch the opening closed.
Blanket:

Finally taking the two triangle pieces of cotton, place them right side to right side & pin together.
Machine sew together using a .5 cm / ¼ seam allowance.
Leave a small section measuring approximately 2” / 5 cm unsewn for turning.
Trim off any excess material from the corners of the triangle, making sure to avoid cutting the lines of sewing.
Turn right side out and ladder stitch the opening closed.
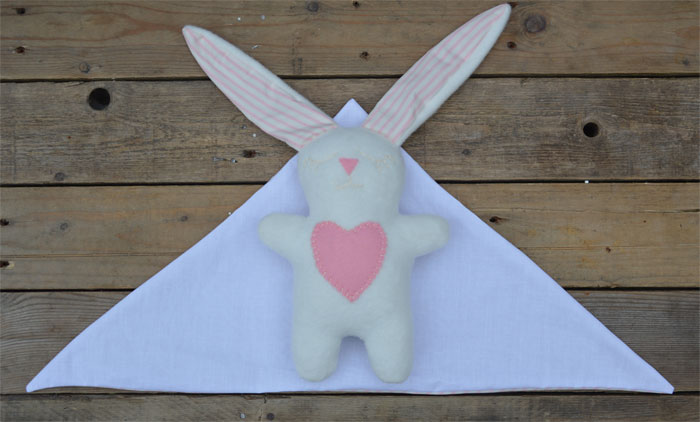
Your Snuggle Bunny is now ready to be wrapped in their little blankey.
I do hope you liked this free pattern and will enjoy making it as much as I liked creating it. If you like my free content and would like to see me creating more, please consider buying me a coffee. Thank you for your support!
![]()

Update 8/03/16
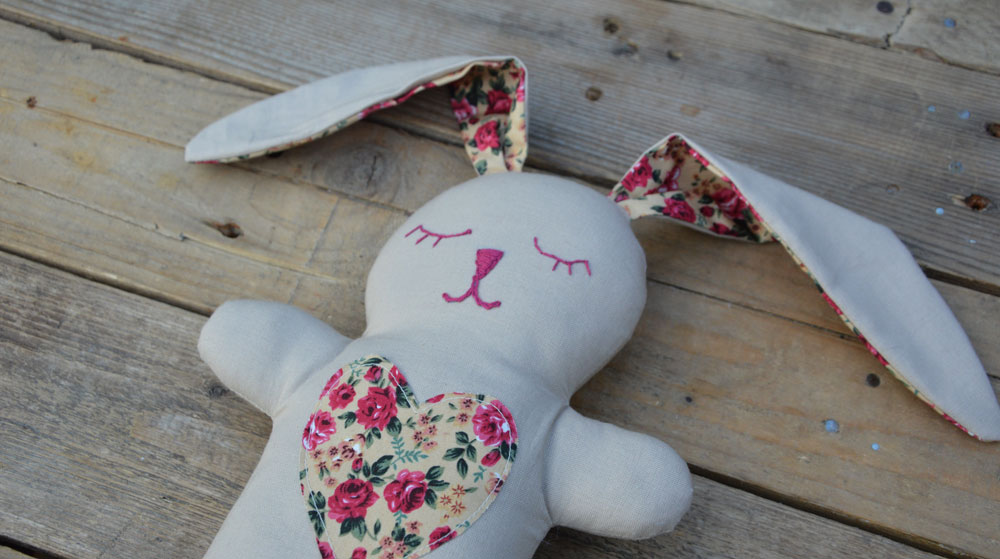
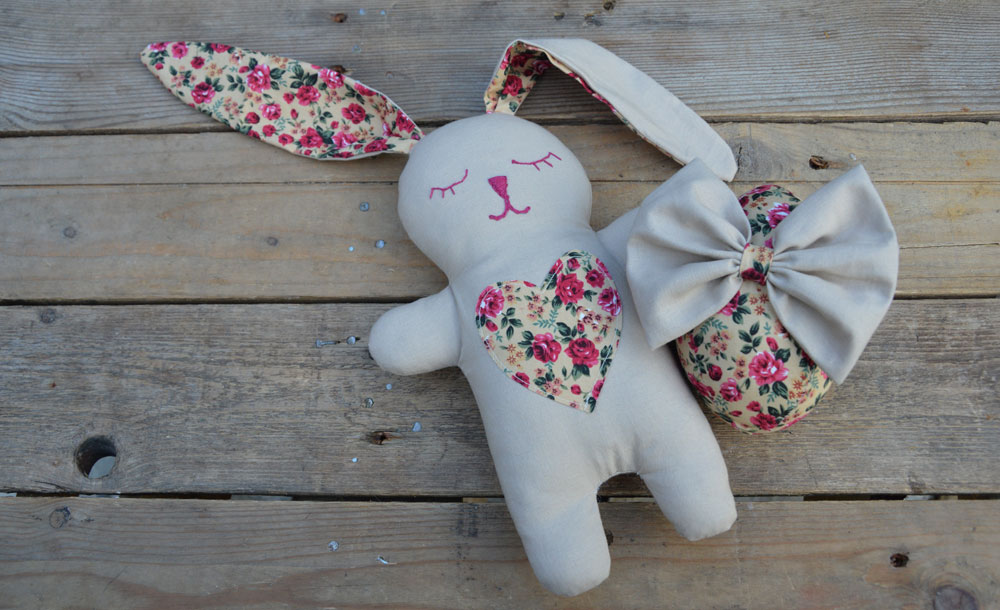
Using the same pattern I also made this cute cotton Snuggle Bunny complete with her own matching Easter Egg. The pattern and tutorial for the Easter egg with a bow is free to download from Here.

The only alterations I made to the pattern are:
- Embroider all of the face detail in place
- Fold the base of the ears before attaching them to the head
- Machine sew the heart onto the front of the body.

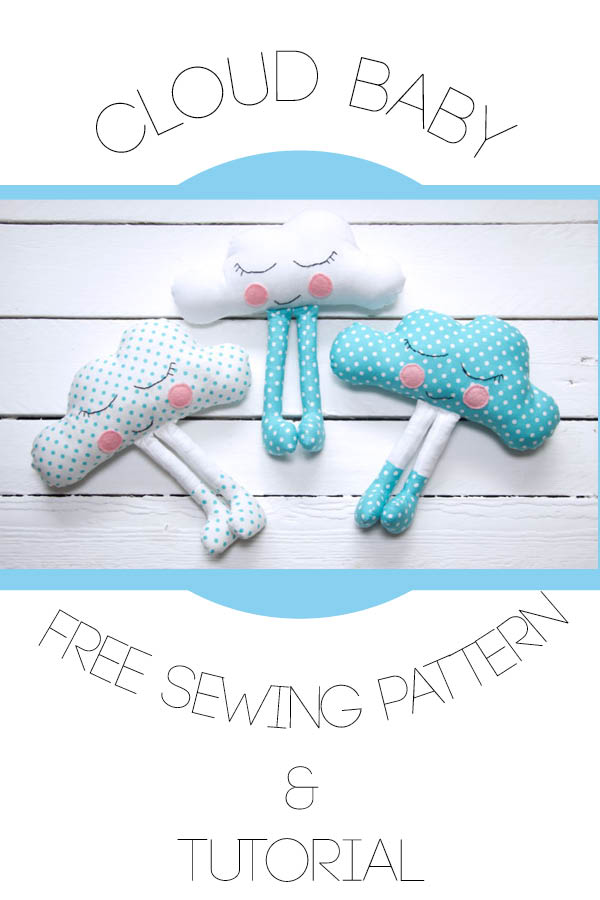
Want to make our Cloud Baby Softie?
Just click on the image above for the free pattern & tutorial.

My Book – Sewing Animal Dolls


Want to make our Twilight Bear Nursery Mobile?
Just click on the image for the free pattern & tutorial.
The pattern is quiet easy I’m saving this for my 1st grandchild when it happens thank you for sharing this with me.
Thank you 🙂
When I opened the pattern, the bunny body was not there. There was only the ear, nose, and the heart. Am I doing something wrong? Could you please check this? Thank you,
Hi Diana,
Thank you for your message, it sounds like you just downloaded one section of the pattern, you have to click on both sections indicated by the “here & here” above (Download Snuggle bunny pattern 1 & 2 here & here.)
Happy crafting
Tina
Thank you! I made two of these snuggle bunnies for my little grand daughters and they both came out beautiful. I hand sewed the heart on the first one, but the second one I zig zagged it on with my sewing machine. Easy, fun & inexpensive!
Excellent 🙂
What a great project for a baby shower present!
Thank you 🙂
How adorable and perfect for my grandson’s first Easter. Thank you for the generous pattern.
Thank you Jennie, happy sewing 🙂 Tina
So very cute! I want to make at least one. 🙂
Very cute and seems plenty easy to make. I will make some for children hospital charity, if permitted. May I have permission? Thanks.
Absolutely Emma, Happy Sewing 🙂
Cute Thank you for Snuggle Bunny pattern.
thanks so much.
Thanks for the permission, Tina I am sure the little ones will love them.
As soon as I saw this, I knew I would have to make it for my granddaughter…but now I’ve made Bunny, he is staying in my sewing room and I’m going to have to make another one to give away!
Hi Sally, really glad you enjoyed making the snuggle bunny, happy bunny sewing 🙂 Tina