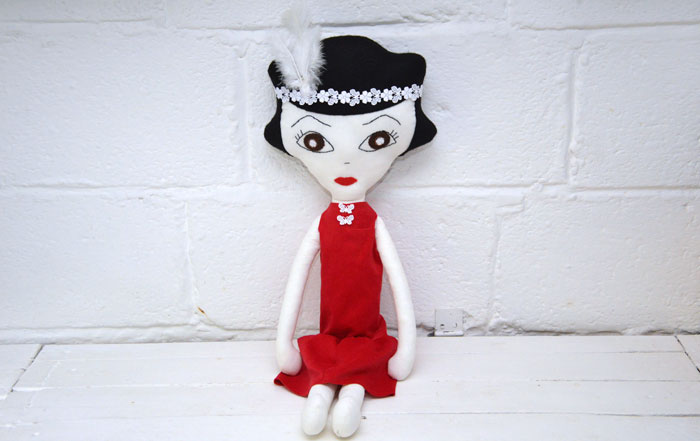
Make your own cute Irish Cailín Rag Doll with our free pattern and tutorial.

Materials:
- Body of the doll – 2 cotton rectangles 9” x 7” (23cm x17.75cm)
- Top – 1 Cotton/linen 5” x 6.5” (12.5cm x 16.5cm)
- Under skirt – 1 felt rectangle 3” x 10” (7.5cm x 25.4cm)
- Apron – 1 cotton 3” x 10” (7.5cm x 25.4cm) Note for the apron I used a cotton handkerchief
- Cloak – felt square 14″ x 14″ (35.5cm x 35.5cm)
- Hair – Black yarn (Acrylic)
- Hand sewing thread (black & white)
- Craft filler
Tools:
- Scissor
- Needle & pins
- Tailor chalk pencil
- Chopstick or hemostat for turning and stuffing
- A4 paper & printer – download the pattern below and print at 100%
To Make:
Print out the patterns linked above. Taking one of the doll pieces of cotton place over the doll and arms pattern and trace onto the wrong side of the material with a tailor chalk pencil.

Place the two pieces of the doll body cotton right sides together so as the doll outline is facing you. Work a back stitch around the outline leaving the areas with the dashed lines unsewn for turning right side out. Tutorial on how to do a back stitch here.


When you have finished all the stitching cut out the doll body and arms from the material leaving 1/4″ (1/2cm) seam allowance.

Next slowly turn the body and arms right side out. I always push the legs from the bottom up into the body and the head down into the body, then pull them through the opening. Either the chopstick or the hemostat (see the 2nd image below) works really well to help with the turning.

Stuff the body and the arms and stitch the openings closed.

Using a ladder stitch attach the arms to the sides of the body. https://missdaisypatterns.com/the-ladder-stitch2/

To make the hair, wrap the yarn 21 times around 4 fingers held together. Pull the yarn on either sides of the loop creating a flat section of hair.

Place the doll’s head over the flat yarn.

Turn the doll and the yarn over together, using the back stitch, sew the hair in place from the top centre off the head down to the bottom centre of the neck (see image).

Turn the doll around and sew the yarn loops into the neck, making sure there are no gaps.

Then taking the thread sew in two eyes and a mouth, small amount of detail only.

Next pin the top pattern to the chosen material (you will not cutting along the dashed lines) and will end up with the shape in the image below.

Turn a small hem on the sleeves and work a running stitch https://missdaisypatterns.com/running-stitch2/ to hold in place. Fold over (right side to right side) and work a back stitch along the sides of the top. Finally, turn a hem at the bottom and work a running stitch to hold in place.


Put the top on the doll and work a running stitch around the neck and pull tight to hold in place. I put the top on from the feet and I didn’t hem the neck line because I wanted a more rustic look.
Next, stitch the short sides off the felt rectangle skirt together with a Whip Stitch https://missdaisypatterns.com/whip-stitch2/ and turn right side out. Work a running stitch around the waist band, place skirt on the doll, pull to fit the waist and stitch in place.

For the apron I used an old decorative handkerchief that had a hem, so I just had to turn a fold and work a running stitch around the waistband. If you are using cotton turn a hem on the three sides and use a running stitch to hold in place.

Place the apron around the doll’s waist, pull tight and stitch in place.

To create the cloak, pin the pattern to the folded felt square and cut out, open up the felt to the full sized triangle. Measure up from the bottom of the cloak 4″ (10cm) on the sides and the centre, mark with the tailor chalk pencil. Measure in 1 1/2 ” (3.8cm) from the left and right sides where you have marked. Stitch a semi-circle in place with a running stitch, (see image below).

Pull the running stitch together and secure with a stitch to hold in place.

Fold the top of the triangle back to create the hood. Line up the stitched area with the doll’s neck line and stitch in place. The sides of the cloak can fold back to the sides. Once you are happy with the position of the hood on the head, stitch in place.


Snuggle Blankey Doll Hand Sewing Pattern
Materials & Tools required to make the Snuggle Blankey Doll: Selection of felt pieces see pattern for the size (in the video I am using wool felt but polyester felt will work as well) Embroidery thread - colour to match the main felt and contrasting colours for...
Halloween – Spider Witch Sock Doll DIY
Make your own Spider Sock Witch Doll with our free Pattern and Video Tutorial. Materials: 1 white sock (Men's size 9-12) 1 stripy sock (Men's size 9-12) 1 black sock (Men's size 9-12) 1 Black kids sock (9-12) A4 sheet of black felt (witch's hat and eyes) Craft filler...
Betty Rag Doll Sewing Pattern
Free Betty Rag Doll Sewing PatternThe Betty Rag Doll Sewing Pattern is my first pattern release as part of the Sew Crafty Design Team. She is inspired by 1920's bisque dolls, one of which I had when I was a kid. She is quite tall measuring 28" in total and...
Fairy Doll No Sew
Fairy Doll No SewQuick and easy to make our latest fairy doll no sew tutorial is here. This fairy doll is easy to customise once the main section has been made, the possibilities are endless.Tools & Materials:Two colours of yarn (for this tutorial I...
Cute Doll Made from Socks
As a follow on to our No sew Sock Penguin we have this cute as a button Sock Doll. She is also completely made from socks. Our Sock Doll does require some hand sewing, making it is a great project to move on to after our Penguin. Materials: 1...
No Sew Fairy Tutorial
Make your own cute fairy with this no sew tutorial.Materials:1 Wooden ball 1 1/5" / 4 cm with a centre hole2 pipe cleaners 11 1/5 " / 29 cmSmall ball of yarn (I used Aran weight 100% wool)3/4" / 2 cm width lace3 skeleton leaves3 pieces of cotton fabric cut the same...
Cloth Doll Tutorial Hair, Face & Clothes
Make your very own cloth doll with our easy to follow sewing videos and free sewing patterns. As promised, our two follow on videos to complete your Cloth Doll are now available on our Youtube Channel and right here on our website. Download the...
Cloth Doll Sewing Pattern and Video
Update 23/11/15 Patterns and Videos to finish your Cloth Doll Available Here Download the Cloth Doll Body Pattern Here Video tutorial available below. Our latest sewing video has just gone live on our website. Our plan from now on is to use a...
Up-cycle gloves into a cute Witch & Cat
Witch & Cat Tutorial Finally to make the scarf you can either recycle a cut off from an old jumper or knitted garment, or crochet/knit a small scarf.
Witch Crochet Pattern
Witch Crochet Pattern Update: Our Witch Crochet Pattern is now only available on our new website, right here. It is one of our most downloaded patterns on Craftsy and the second crochet pattern I developed when I started writing patterns. Just...


